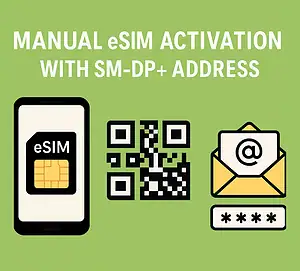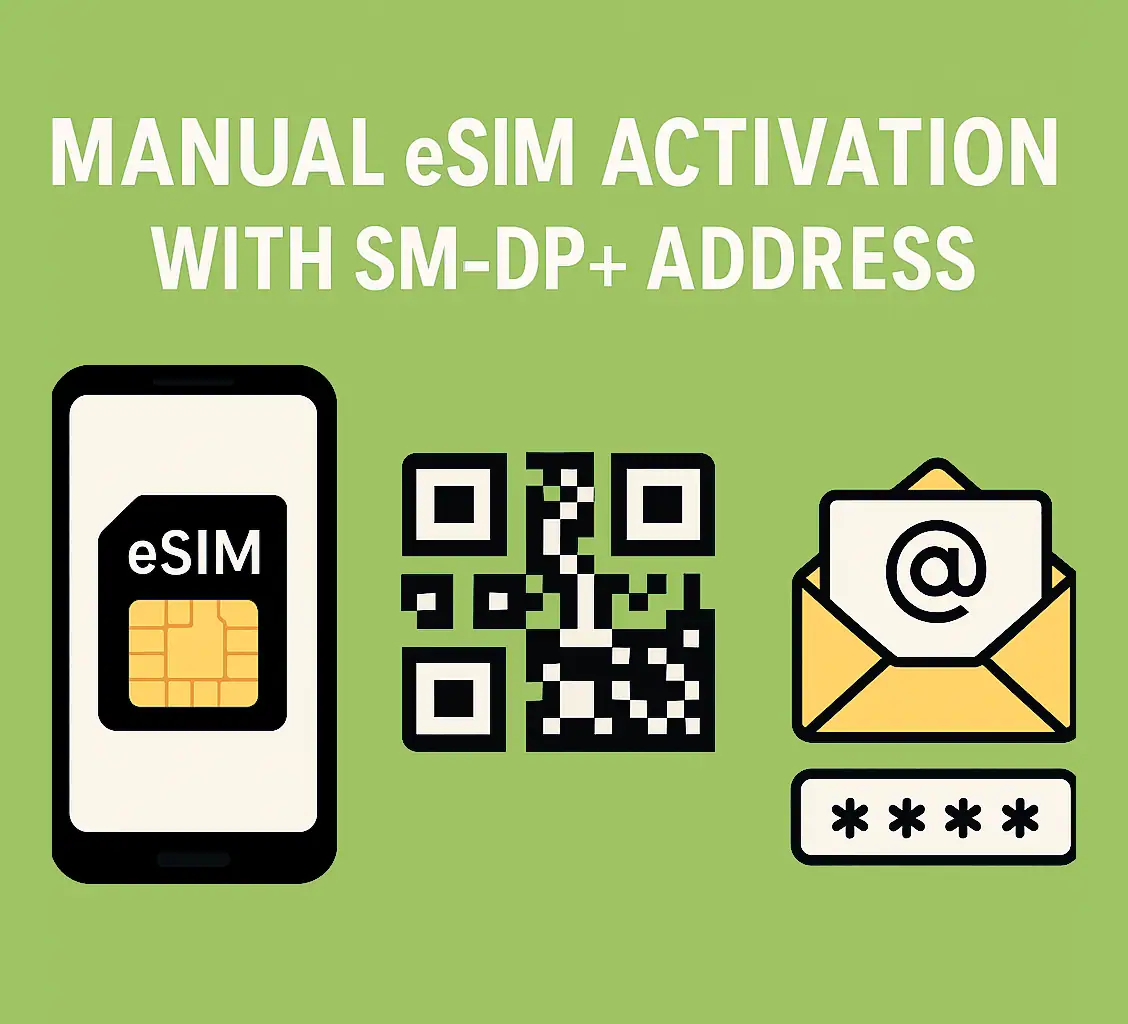
Manual eSIM Activation with SM-DP+ Address
Are you a frequent traveler or someone who needs multiple phone numbers? eSIM technology could be the perfect solution. Most modern smartphones now support dual SIM with eSIM, offering more flexibility than physical SIM cards—especially when abroad.
When you buy an eSIM, you’ll usually receive:
- A QR code
- An SM-DP+ Address
- An activation code
This guide explains what the SM-DP+ Address is, why it matters, and how to use it for manual eSIM installation.
👉 Looking for a travel-friendly eSIM? Get one here at a fair price.
What is an SM-DP+ Address?
An SM-DP+ Address (Subscription Manager Data Preparation) is like a digital gateway. It allows your phone to securely connect to your carrier’s eSIM management system.
Think of it as:
- A digital address that your phone uses to fetch your eSIM details
- Similar to a URL or email address, but for your eSIM
- The secure connection point between your device and the carrier
By using this address, your device can safely download, activate, and configure your eSIM profile.
How It Works
Here’s the process behind the SM-DP+ Address:
- Connection – Your device connects to the carrier’s server using the SM-DP+ Address.
- Profile Download – The server sends your eSIM profile, including authentication details.
- Configuration – Your phone automatically sets up the eSIM.
- Security – The system verifies everything to prevent unauthorized access.
This is particularly useful when manual activation is required—like when you can’t scan a QR code.
When to Activate an eSIM Manually
Manual activation is helpful if:
- You don’t have the QR code (lost email, alternate delivery).
- The QR code doesn’t scan properly.
- Your phone can’t scan a code on the same screen it’s displayed.
- You prefer more control over the process.
Requirements for Manual Activation
Before starting, make sure you have:
- An eSIM-compatible device (iPhone XS+, Pixel 3+, Samsung S20+, etc.)
- Carrier-unlocked phone (unless using the carrier’s own eSIM).
- Activation credentials (SM-DP+ Address + activation code).
- Internet connection (Wi-Fi or mobile data).
How to Get Your Credentials
After purchase, you’ll receive an email containing:
- Your QR code
- SM-DP+ Address
- Activation code
If you can’t find the email, contact [email protected].
⚠️ Note: The SM-DP+ Address is not a website. Even if it looks like a link, you can’t open it in a browser—it only works inside your phone’s eSIM settings.
Manual eSIM Setup Guide
iPhone (XS and newer)
- Go to Settings → Cellular/Mobile Data → Add Cellular Plan.
- Select Use QR Code → then Enter Details Manually.
- Enter the SM-DP+ Address and activation code (exactly as given).
- Follow prompts to finish setup and choose line preferences.
Samsung (S20 and newer)
- Go to Settings → Connections → SIM Card Manager → Add Mobile Plan.
- Tap Scan Carrier QR Code → then Enter Activation Code.
- Enter your details → Connect → Add.
Google Pixel (3 and newer)
- Go to Settings → Network & Internet → Mobile Network (+ icon).
- Select Download a SIM instead → Next → Need help?
- Tap Enter Details Manually → Input activation info.
Troubleshooting Tips
If you run into issues:
- Double-check your SM-DP+ Address and activation code (case-sensitive).
- Ensure stable Wi-Fi or cellular connection.
- Restart your phone after setup.
- Contact your provider’s support if errors persist.
Final Thoughts
The SM-DP+ Address may sound technical, but it’s simply the secure link between your phone and your carrier’s eSIM system. Knowing how to use it gives you extra flexibility—especially when QR code activation isn’t possible.
Whether you’re traveling in Europe, Turkey, or the USA, understanding manual activation ensures you’ll stay connected without hassle. With this guide, you now have the knowledge to install your eSIM anywhere, anytime.