Learn how to use an eSIM on your iPad, including which devices are compatible and the steps to activate it. Plus, discover travel eSIM plans for seamless connectivity while abroad.
Since 2018, eSIMs have been included in certain iPad models, but there isn’t a specific eSIM exclusive to these devices. This raises the question of how to get an iPad eSIM and which models are compatible.
In this quick guide, we’ll cover everything you need to know about using an eSIM on your iPad, which devices support it, the installation process, and options like travel eSIMs for a reliable internet connection while traveling abroad.
Can an eSIM be used on an iPad?
Yes, some iPads support eSIM technology, though not all models are compatible. An eSIM (embedded SIM) is a digital SIM card built directly into your device. It functions like a physical SIM card, allowing you to access mobile data by simply scanning a QR code to activate it on your iPad.
eSIM-compatible iPads let you easily connect to local mobile networks, making it a great option for travelers looking for a simple way to stay connected abroad.
Before diving into the setup process, let’s first check which iPad models are compatible with eSIM.
Which iPads Are eSIM Compatible?
The following iPad models support eSIM functionality:
- iPad Pro 13-inch (M4)
- iPad Pro 12.9-inch (3rd to 6th generation)
- iPad Pro 11-inch (M4)
- iPad Pro 11-inch (1st to 4th generation)
- iPad Air 13-inch (M3)
- iPad Air 11-inch (M3)
- iPad Air 13-inch (M2)
- iPad Air 11-inch (M2)
- iPad Air (3rd to 5th generation)
- iPad (A16)
- iPad (7th to 10th generation)
- iPad mini (A17 Pro)
- iPad mini (5th and 6th generation)
Note: The iPad A16, iPad Pro M4, iPad Air M2, and iPad Mini A17 Pro are eSIM-only models.
How to Set Up an eSIM on iPad
Here’s a step-by-step guide to installing an eSIM on your iPad:
Using eSIMa App (iPadOS 17.5)
- Download the eSIMa App from the App Store.
- Log in with the email address you used to purchase your eSIM.
- Navigate to My eSIMs and select the eSIM you want to install.
- Tap Install and Activate, then choose the Automatically option.
- Tap Install and Activate again, and read the instructions.
- Click I Understand, then tap Continue and Allow.
- Tap Continue when the Activate eSIM message appears, and you’re done!
Using a QR Code
- Open Settings and go to Cellular or Mobile Data.
- Tap Add a New Plan and choose the Use QR Code option.
- Scan the QR code and tap Continue when the Activate eSIM message appears.
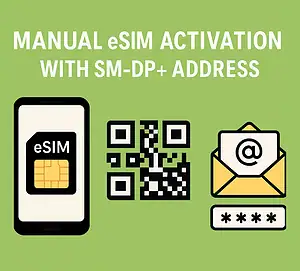
Using Manual Codes
- Open Settings and go to Cellular or Mobile Data.
- Tap Add a New Plan and choose the Use QR Code option.
- Select Enter Details Manually, then copy and paste the SM-DP Address and Activation Code from your confirmation email.
- Tap Next, and then tap Continue when the Activate eSIM screen appears.
- Once the eSIM is successfully added, you’ll see the Cellular Setup Complete message.
- Tap Done, change the name of your iPad’s eSIM plan, and select it as your default data line.
Stay Connected Abroad with an eSIM for iPad
For reliable, high-speed internet on your iPad while traveling, eSIMa has you covered.
With eSIMa’s plans, you get access to:
- Unlimited data in over 200 destinations
- Up to 1 GB of hotspot data
- 24/7 customer support
- Up to 5G speeds
Plans start at just $1.55/day, so you can always stay connected abroad.
If you need a more comprehensive plan, consider eSIMa’s Unlimited Plan. For $64.90/month, you get:
- Unlimited data
- Unlimited hotspot data
- A European phone number
- Coverage in over 170 destinations
Whether you’re traveling for business or leisure, eSIMa ensures your iPad remains connected without any hassle.