 WhatsApp +44 7367 063273
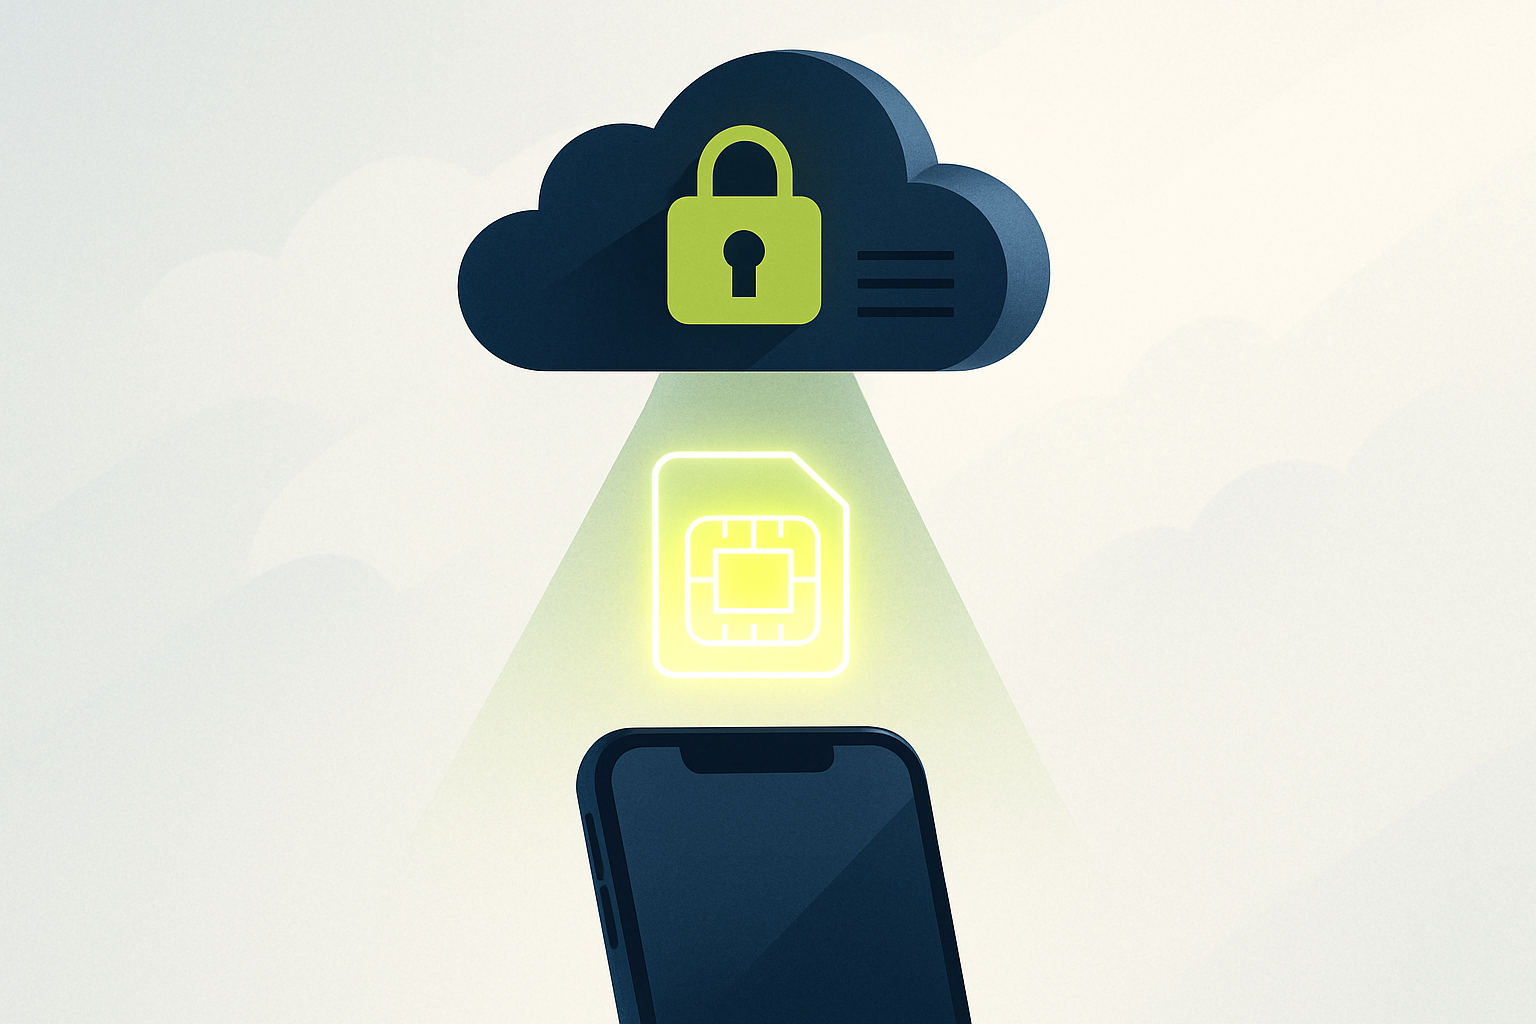
An SM-DP+ address is the server location where your eSIM profile lives before installation, paired with an activation code that authorizes your device to download that profile. You need both when installing an eSIM manually—typically when a provider doesn't offer a QR code, when you're reinstalling a profile, or when the QR scan fails.
Understanding the SM-DP+ address and activation code
The SM-DP+ (Subscription Manager Data Preparation Plus) is the GSMA standard server that stores eSIM profiles before they're downloaded to your device. When a carrier or travel eSIM provider provisions your eSIM, they upload the profile to an SM-DP+ server and generate two pieces of information: the server address (a URL like smdp.io, prod.ondemandconnectivity.com, or the carrier's own domain) and a unique activation code (a long alphanumeric string, sometimes called a matching ID or confirmation code).
Together, these two values tell your device exactly which profile to fetch and prove you're authorized to download it. The SM-DP+ address is the "where," and the activation code is the "which one and permission to proceed." Neither is the same as your SIM number (ICCID), which is assigned only after the profile installs on your device. You can't reuse an activation code—once the profile downloads, the code becomes invalid, and you'd need a fresh code to reinstall on a different phone.
Most providers bundle the SM-DP+ address and activation code into a QR code for quick scanning, but the manual-entry option exists for situations where scanning isn't practical: broken cameras, second-hand profile transfers (when allowed by the provider), or simply preference. The underlying installation process is identical—manual entry just types what the QR encodes.
When you need to enter an SM-DP+ address manually
You'll enter the SM-DP+ address and activation code by hand in a few common scenarios. First, if you're using an iPad or a device without a working camera, you can't scan the QR. Second, some eSIM providers—particularly enterprise or IoT platforms—only issue manual credentials, no QR at all. Third, if the QR code is damaged, won't scan, or lives on the same device you're installing to (you can't photograph your own screen easily), typing the details is faster than printing or transferring the image.
Travel eSIM users also turn to manual entry when reinstalling a data eSIM plan on a replacement phone. If your original device breaks or you upgrade, many providers let you request a new activation code for the same subscription (some charge a small reissue fee, others do it free). You then enter the fresh SM-DP+ address and code on the new device. This is not the same as the eSIM "transfer" function on newer iPhones, which moves already-installed profiles between your own devices via Bluetooth—manual entry with a new code is for moving to a completely different handset or when the provider doesn't support quick transfer.
Where do I get the SM-DP+ address and activation code?
Your eSIM provider sends you the SM-DP+ address and activation code when they provision your profile. For travel eSIM services, this typically arrives by email immediately after purchase, or you view it in your account dashboard under "My eSIMs" or similar. The details are also shown on-screen during checkout—copy them or screenshot before closing the page if you plan to enter manually.
For traditional mobile carriers (T-Mobile, AT&T, Verizon, Vodafone, etc.), the process varies. If you order a new line or device online, the confirmation email or shipping notification often includes the SM-DP+ address and code. In-store or phone activations may show the details on the sales receipt or in an SMS. Some carriers use their own apps—T-Mobile's account app, for example, can display eSIM credentials for lines you manage. If you can't find the information, contact your provider's support team; they can regenerate the code (the SM-DP+ address stays the same for a given carrier, but the activation code is unique per profile and session).
You cannot find the SM-DP+ address by digging through your device settings—it's not stored locally. The address and code exist only on the carrier's server and in the communication they send you. If you've lost the email or screenshot, you'll need to request a reissue from the provider. Most travel eSIM platforms let you do this via your dashboard; traditional carriers usually require a call or chat to support.
How to manually install an eSIM on iPhone using the SM-DP+ address
iPhones running iOS 13 or later support manual eSIM installation. The process is nearly identical across models—iPhone XS and newer (excluding the standard iPhone SE 2nd/3rd gen, which lack eSIM), plus Wi-Fi + Cellular iPad models from iPad Pro 11" 3rd gen, iPad Air 4th gen, and iPad mini 6th gen onward. US-market iPhone 14, 15, and 16 models are eSIM-only with no physical SIM tray, so all lines install this way.
- Open Settings and tap Cellular (or Mobile Data in some regions).
- Tap Add Cellular Plan. If you already have one or more eSIMs or a physical SIM, this option appears below your existing lines.
- When the QR scanner opens, look at the bottom of the screen and tap Enter Details Manually (the link is small, below the camera frame).
- You'll see two fields: SM-DP+ Address and Activation Code. Copy-paste or type both exactly as your provider supplied—these strings are case-sensitive and often very long. Double-check for typos.
- Tap Next in the top-right corner. Your iPhone will contact the SM-DP+ server, authenticate the code, and download the eSIM profile. This takes 10–30 seconds and requires an active internet connection (Wi-Fi or your current cellular data).
- Once installed, iOS will ask you to label the line (e.g., "Travel," "Work," or the destination country). Choose something memorable.
- Set your default line for cellular data. If this is a travel eSIM, you'll typically select it as your data line and leave your home SIM as the default for calls and iMessage. You can change this anytime in Settings → Cellular.
- Enable Data Roaming for the new eSIM line: tap the line name in Settings → Cellular, then toggle Data Roaming on. Travel eSIMs require this switch because, to your phone, the local network in the destination country is "roaming" relative to the eSIM's registered home (even though you won't be billed roaming fees—the travel eSIM plan covers it).
Your iPhone can store eight or more eSIM profiles (the exact limit varies by model and iOS version) and run two lines simultaneously—one eSIM and one physical SIM, or two eSIMs on eSIM-only models. You switch which eSIM is active by going to Settings → Cellular, tapping the line, and toggling Turn On This Line. Only one eSIM can carry cellular data at a time unless you enable the "Allow Cellular Data Switching" feature, which temporarily borrows the other line's data if the primary has no signal.
How to manually install an eSIM on Android using the SM-DP+ address
Android eSIM support debuted with Android 9 Pie, and the manual-entry path lives in the SIM settings. The exact menu labels vary slightly by manufacturer (Samsung, Google Pixel, OnePlus, etc.) and Android version, but the core steps are consistent. Make sure your device appears on your carrier's or travel provider's compatible devices list before purchasing—not all Android phones include an eSIM chip, even recent models.
- Open Settings and navigate to Network & internet (or Connections on Samsung devices).
- Tap SIMs (or Mobile networks / SIM card manager depending on your phone).
- Look for Add eSIM, Add mobile plan, or a + icon. Tap it.
- Android will open a QR scanner. At the bottom of the screen, tap Enter it manually or Need help? then Enter it manually (the wording varies—some Samsung phones say Download a SIM instead? or Activation code).
- You'll see fields for the SM-DP+ address (sometimes labeled SM-DP+ Server Address) and the Activation Code (or Matching ID). Enter both exactly as provided. Some Android builds show a single combined field where you paste the full string in the format
LPA:1$smdp-address$activation-code—if you received a single long string starting withLPA:, paste it whole; otherwise use the separate fields. - Tap Add, Download, or Continue. The phone will fetch the profile from the SM-DP+ server. This takes 10–45 seconds and needs an active data connection.
- Once downloaded, Android will prompt you to enable the eSIM. Toggle it on.
- Name the eSIM (e.g., "Japan Travel," "Secondary Line") for clarity if you run multiple SIMs.
- Set which SIM handles mobile data: go back to Settings → Network & internet → SIMs, tap Mobile data, and choose the new eSIM if it's your travel data plan. Leave calls and SMS on your home SIM so you still receive verification codes and calls from your home number.
- Enable Data roaming for the eSIM: tap the eSIM name in Settings → SIMs, then toggle Roaming on. As with iPhone, travel eSIMs need roaming enabled to connect to local networks abroad.
Most modern Android phones support one eSIM active at a time alongside the physical SIM (dual-SIM with one eSIM slot), though some newer models like Google Pixel 7/8/9 and Samsung Galaxy S23/S24 can hold multiple eSIM profiles in storage and let you switch between them. Only one eSIM can be active simultaneously unless the hardware explicitly supports dual active eSIM—rare outside a few flagship models. Check your manufacturer's specs if you plan to juggle several eSIMs.
Difference between SM-DP+ address and ICCID (SIM number)
The SM-DP+ address and the ICCID (Integrated Circuit Card Identifier) serve completely different roles and appear at different stages of eSIM use. The SM-DP+ address is a server URL you enter before installation to tell your device where to download the eSIM profile. The ICCID is the eSIM's unique 19- or 20-digit serial number, assigned by the carrier and embedded in the profile itself—you only see it after the eSIM installs.
Think of the SM-DP+ address and activation code as the "shipping label and unlock code" that deliver the eSIM to your phone, and the ICCID as the "serial number printed on the SIM once it arrives." You cannot use an ICCID to install an eSIM (it identifies the profile, it doesn't grant access), and you won't find the SM-DP+ address in your settings after installation (it's a one-time download instruction). If a website or support agent asks for your "SIM number," they want the ICCID, which you find on iPhone under Settings → General → About (scroll to each line's ICCID field) or on Android under Settings → About phone → SIM status.
Common SM-DP+ addresses by carrier
Each mobile carrier and eSIM platform uses its own SM-DP+ server infrastructure. While you always receive the exact address from your provider, recognizing the domain can help you verify you're entering the right details. T-Mobile eSIM profiles in the United States, for example, often use an SM-DP+ address on T-Mobile's domain or a partner platform—customers typically find this in the T-Mobile app under account settings or in the activation email when setting up a new line.
AT&T (and its prepaid brands like Cricket Wireless) similarly provision eSIMs through their own SM-DP+ servers; you'll see the address in your order confirmation or by logging into your AT&T account online. International travel eSIM providers like Airalo, Ubigi, and Nomad use third-party SM-DP+ platforms (common ones include smdp.io, prod.ondemandconnectivity.com, or rsp.goog for Google Fi). Lebara, a popular MVNO in Europe, issues eSIM credentials via email after purchase, with the SM-DP+ address shown alongside the activation code in your account portal.
You will never need to guess or look up an SM-DP+ address yourself—your provider supplies it every time. If you're troubleshooting and the address looks unfamiliar, double-check the email source or log into your provider's dashboard to confirm it matches. Scam emails occasionally circulate with fake eSIM credentials; legitimate providers always send from their official domain and the SM-DP+ address will match the company's known infrastructure or a recognized partner platform.
Troubleshooting manual eSIM installation errors
If manual entry fails, the most common culprit is a typo in the SM-DP+ address or activation code. These strings are long, case-sensitive, and easy to mistype—copying and pasting is always safer than typing by hand. Watch for extra spaces at the beginning or end (common when pasting from email) and ensure the entire code is captured if it spans multiple lines in the source. Some email clients insert line breaks in long strings; paste into a plain-text editor first to strip formatting.
"Activation Code Invalid" or "Unable to Complete Cellular Plan" errors usually mean the code has already been used or has expired. Activation codes are single-use: once the profile downloads to a device, the code becomes void. If you tried to install on one phone and now want to move to another, you need a new code from your provider. Some eSIM platforms let you generate a new code yourself in the account dashboard; others require a support request. Expiration is rare for travel eSIMs (most codes stay valid for weeks or months), but enterprise or carrier eSIMs sometimes expire within 24–48 hours of issue—check your provider's documentation.
No internet connection will prevent the download outright—your device must reach the SM-DP+ server. If you're installing at home, connect to Wi-Fi. If you're already traveling and the physical SIM or another eSIM has data, make sure that line is active before starting the installation. "Network Error" or "Server Unreachable" messages can also indicate the SM-DP+ server is temporarily down (rare, but happens during maintenance) or that your device's date and time settings are wrong—eSIM authentication relies on accurate time, so enable automatic date & time in Settings → General → Date & Time (iPhone) or Settings → System → Date & time (Android).
If everything looks correct and installation still fails, restart your device and try again. A fresh boot clears temporary glitches in the eSIM subsystem. If the problem persists, contact your provider's support—they can check server logs to see if the code was rejected and why, and they can issue a replacement code if needed. For additional help with eSIM setup across different devices, visit our eSIM setup help center.
Frequently asked questions
Where do I get the SM-DP+ address?
What is SM-DP+ address?
smdp.io or a carrier-specific URL) and is unique to the provider or platform hosting the eSIM. You use it only during the initial setup—once the eSIM installs, the address isn't stored or visible on your device.Is SM-DP+ address the same as SIM number?
What is T-Mobile SM-DP+ address?
Where to find the SM-DP+ address on Android?
Can I reuse an SM-DP+ address and activation code?
What if manual eSIM installation says "Activation Code Invalid"?
Do I need Wi-Fi to enter the SM-DP+ address and install an eSIM?
Ready to get connected?
Browse instant eSIM plans for 190+ destinations — installed before you land.

Written by
Samir Ch
I road-test travel eSIMs across the destinations we cover, so the advice here is field-checked — not copied off a spec sheet.
Continue reading
How to Transfer an eSIM Between iPhone and Android
Learn how to transfer eSIM to new phone across iPhone and Android. Covers eSIM Quick Transfer, carrier re-activation, and what to do when the old phone isn
How Much Data You'll Need for a Europe Trip: A Practical Guide
How much data do i need for europe: Planning a Europe trip? Learn realistic data estimates by activity and trip length, plus why a travel eSIM beats
How to Set Up and Activate Your eSIM: Step-by-Step Guide
Learn how to set up an eSIM on iPhone and Android with step-by-step QR scan and manual activation instructions, plus what to do before you fly.
How Many eSIMs Can I Use on My iPhone?
How many eSIMs can an iPhone have? Store 8+ and use 2 at once. Full breakdown by model, plus how to add, label and switch between lines.